Roasted Red Pepper Hummus

Two days ago, I wrote out some instructions for roasting red peppers.  Now that you know how to roast red peppers, you have been looking for an excuse to try it, right?  Look no further!

I love hummus.  Actually, let me rephrase that.  I love dips!  Hummus is an incredibly full-of-flavour, healthy and garlicky dip.  My love affair with hummus started about a year ago.  Since then, I’ve made a few different types, and traditional hummus. 

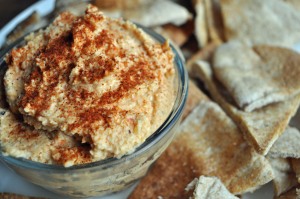
Roasted red peppers add a delicious twist to hummus, plus they give it some extra nutrition.  To the hummus I made today, I threw in some feta cheese and some chipotle chili powder.  This gave it a bit of a kick, but it’s totally optional!  You can add it whatever you want. 

I love hummus with pita chips.  (I posted the recipe for them a few months ago.)  You can also serve it with cut up veggies. 

Hummus traditionally uses tahini, which is a sesame seed paste.  For the longest time, I couldn’t find tahini when I looked for it.  Peanut butter is a good substitute.  I prefer tahini, and I think it’s worth seeking out (you can find it by the nut butters in the grocery store).  If you use peanut butter, you can drizzle in some sesame oil to give it that sesame flavour.

Roasted Red Pepper Hummus
Recipe adapted from Grazing by Julie Van Rosendaal

1- 540 mL (19 oz) can chickpeas, drained and rinsed
2 tbsp tahini
2 tbsp plain yogurt
2 gloves garlic, peeled
1 tbsp olive oil (optional)
juice of 1 lemon
2 roasted red peppers, seeds removed
salt and pepper to taste

Put garlic in the food processor and process to finely chop.  Add everything else and whiz, stopping occasionally to scrape down the sides of the bowl, until everything is pureed together.  Add salt and pepper to taste, and a little water if it’s too thick.  Serve with pita chips or cut up veggies.

Have a great day!
The Hungry Teacher

Leave a comment

Filed under Uncategorized

Upside-down Blueberry Streusel Coffee Cake

Blueberries are one of my favorite fruits!  They are not too sweet, easy to eat and they freeze well.  There are blueberry farms everywhere around here!  Everyone is growing them, and as a result, they’re pretty reasonable in price!  I’ve bought 12 lbs so far, made blueberry syrup (and canned it), coffee cake, and froze the rest!

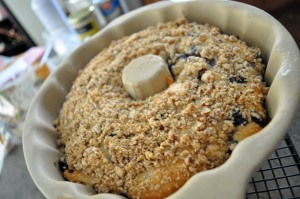
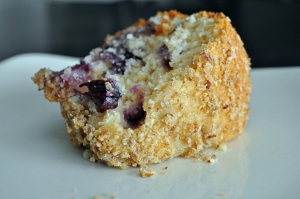
I saw the recipe for this coffee cake, and I had to try it.  The main reason is because I got a Pampered Chef stoneware bundt pan for a wedding gift that I had never used (even though I have been married for over three years!).  This presented the perfect opportunity!  The cake turned out well, and was pretty easy to make.  The thing that really bothered me about it was that you put the batter in the pan, then sprinkle the streusel over top.  BUT, when you go to take the cake out of the pan, you have to turn it upside down (which means a lot of the streusel falls off), and then turn it right side up again!  The streusel is the best part… I don’t want to lose any of it!  If you have a brilliant solution to this problem, please let me know!!!!!

Oh, and I did not have Bisquick, so I found a recipe online to make my own.  I’ll post it at the bottom of this page.  It was really easy, and it worked just fine!  I also did not have any fresh lemons, so I omitted the lemon zest.  But, it probably would have given the cake a really nice flavour, so I’ll add it next time!

Upside-Down Blueberry Streusel Coffee Cake
Recipe adapted from Eat, Shrink and Be Merry by Janet & Greta Podleski

Streusel Topping
1/4 cup chopped pecans
3 tbsp all-purpose flour
2 tbsp brown sugar
1 tbsp butter, melted

Cake
2 cups Bisquick baking mix
1 cup all-purpose flour
1 cup granulated sugar
1 tsp ground cinnamon
3/4 cup lemon yogurt (or plain yogurt, with 2 tbsp lemon juice and 1 tbsp sugar)
2 eggs
1/3 cup milk
1/4 cup vegetable oil
2 tsp grated lemon zest
1 tsp vanilla
2 cups fresh blueberries (or you can use frozen)

Preheat oven to 350°F.  Spray a bundt pan with cooking spray and dust lightly with flour.  Set aside

Combine all streusel ingredients in a small bowl and mix well with a fork.  Set aside.

Combine Bisquick, flour, sugar and cinnamon in a large bowl.  In a medium bowl, mix together yogurt, eggs, milk, oil, lemon zest and vanilla.  Add wet ingredients to dry ingredients and mix just until dry ingredients are moistened.  The batter will be thick.  Gently fold in blueberries. 

Spoon batter into prepared bundt pan.  Sprinkle streusel evenly over batter.  Bake for 40-45 min or until a toothpick inserted in the center of the cake comes out clean.  Cool cake in pan on a wire rack.  Loosen edges using a knife.  Invert cake onto a serving plate, and then flip cake over so the streusel is on top. 

Enjoy!

Homemade Bisquick
Recipe from this forum.  There are many out there, but most had shortening and/or dry milk in them (neither of which I had at home).  I made half a batch, and am storing the rest in my fridge, looking for ways to use it!!

9 cups all-purpose flour
1/2 cup baking powder
1 tsp salt
1-1/4 cups canola oil

Mix dry ingredients well.  Cut in oil with a pastry blender until the mixture looks like cornmeal.  Store, tightly covered, in the fridge.  Use like you would Bisquick! 

Have fun!
The Hungry Teacher

Leave a comment

Filed under Baking, Dessert

A Step By Step Guide to Roasting Red Peppers

I’ve learned a lot about barbecuing this summer. 

1.  If you’re cooking fatty foods, stay close to the BBQ.
2.  Keep the heat on medium.
3.  If you don’t want your food to be completely black on the outside, preheat the BBQ and then turn off the burner under the food you’re cooking.
4.  How to roast red peppers.

There’s other things I’ve learned, but I’m going to keep this post short and sweet!

Roasted red peppers are delicious!  This is the first year I’ve made them, and they are so versatile!  You can make hummus with them, roasted red pepper sauce, throw them in pasta, put them in sandwiches… yum!  

Yes, you can buy roasted red peppers in a jar.  But, here, in my part of Canada, they’re expensive!  It’s around $6.00 for a jar (which isn’t very big), and I can buy peppers from the green house for $2.50 for 2 lbs!!!  And, I think they taste better fresh!  Plus, they’re very easy!

1.  Preheat your BBQ.  I like to turn all of my burners on high, and then turn them down once it’s hot. 

2.   Keep the heat on medium under your peppers, and turn the other burners off if you don’t need to use them.

3.  Wash and dry your peppers and put them whole on the BBQ.

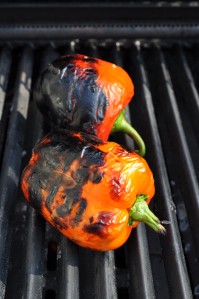
4.  Wait about 2 minutes, until the first side is black, and turn them over (yes, this is one time when you want your food to be black!)

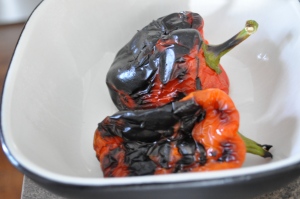
5.  When they look like this on all sides, they’re ready!

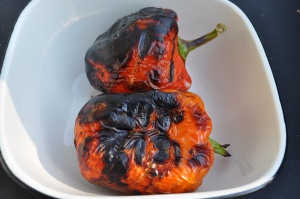
6.  Put them in a bowl:

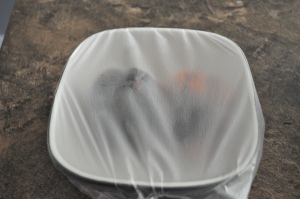
7.  Cover them with plastic wrap (this allows them to steam and makes the skin really easy to remove):

8.  Wait until they’re cool, and then peel all of the skin off.  It’s usually really easy.  Whatever you do, don’t rinse them!  You’ll take away the smoky, delicious flavour! 

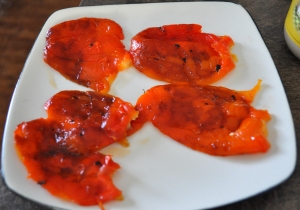
9.  Rip or cut them in half and remove the seeds and stem. 

10.  Voila!  You’ve got roasted red peppers to slice, puree or do what you please with!

Enjoy!

The Hungry Teacher
5 Comments

Filed under BBQ, Side Dish, Vegetarian

Green Beans Galore!

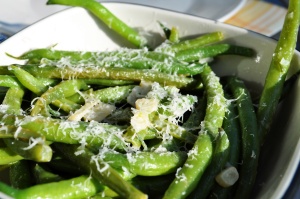
Jamie Oliver's Best Ever French Beans

With summer in Chilliwack comes the fresh produce!  Strawberries, blueberries, raspberries and green beans have been on the menu so far, and we’re eagerly waiting for our world-famous corn! 

Last night and tonight we had green beans.  Oh man!  There is nothing better than fresh green beans picked and eaten on the same day!

I made two different recipes, each good in its own way.  I think that the second one is my favourite, but that is probably because it is an old family recipe, one my grandma always made!  Grandma Jacob’s recipe seems a bit odd, but try it!  It is soo good! You’ll be pleasantly surprised!

To prep the green beans, pinch off the stem end, but leave the wispy end on.  Wash under running water. 

To cook the beans, boil a pan of salted water.  Put the beans in, and cook for 6-8 minutes, until tender, but still crisp.  It’s a bit of a personal thing, but cook them a bit under what you think is good, as both of the recipes will cook the beans a bit more.  Drain the beans in a colander and let steam dry for a minute.

Best Ever French Beans
Recipe adapted from Jamie’s Food Revolution
Serves 4-6

1 lb fresh green beans
3 cloves garlic, peeled and sliced
1-1/2 cups Parmesan cheese, grated
extra-virgin olive oil
juice of 1/2 a lemon

Prepare beans as noted above.  When you drain your beans, save some of the cooking water (about 1/2 cup or so).  Return the pan to the heat.  Add in some olive oil and the garlic.  Stir.  When the garlic starts to turn golden, add the beans and stir around.   Add a ladleful of reserved cooking water, the cheese and lemon juice.  Stir and simmer until the water and cheese start to form a sticky sauce, then remove from heat and serve immediately!

Grandma Jacob’s Green Beans
Old family recipe
Serves 4-6

1 lb green beans
2 Tbsp butter
2 Tbsp flour
salt and pepper

Prepare green beans as noted above.  Return the pan to the heat and add butter.  When the butter melts, stir in flour.  Add in the green beans and salt and pepper to taste.  Stir until the beans are coated.  Serve immediately!  So good!!!!

Enjoy summer’s bounty!
The Hungry Teacher
Leave a comment

Filed under Side Dish, Vegetarian

Spicy Margarita Shrimp

The sunny weather brings out the barbeque-er in all of us!

While looking for a quick, healthy and easy dish for dinner one night this week, I stumbled upon a recipe for Spicy Margarita Shrimp on Tasty Kitchen.

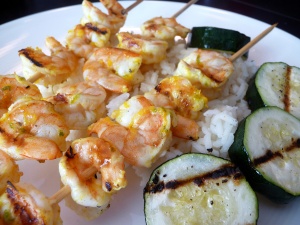
It was really good, and really easy!  I adapted the recipe a bit, of course, as we all tend to do!   The recipe says to marinate the shrimp for no longer than an hour, because otherwise the acid in the marinade will start to cook the shrimp.  I marinated my shrimp for about half an hour, and it was the perfect amount of time!  The recipe also called for the remaining marinade to be reduced down in a saucepan to serve on top of the shrimp and rice.  I didn’t do this.  It would be a nice touch, but unnecessary!  You could also cook the shrimp on the stove by sauteeing them.  If you’re using wooden skewers, soak them in water for about half an hour before you use them so they don’t catch on fire.

On the side, I served rice and grilled zucchini.  The shrimp take about 3 minutes total on the hot grill, so make sure everything else is ready to go before you put them on!  To grill the zucchini, I cut it into 1/2″ thick slices.  In a small bowl, combine olive oil, minced garlic, salt and pepper.  Brush the zucchini slices with this mixture on one side and put oiled side down on the hot grill.  Cook for about 4 minutes, then brush the other side with the oil mixture and flip.  Cook for about 4 more minutes! 

Spicy Margarita Shrimp
Recipe adapted from Tasty Kitchen
Serves 2

1 lb shrimp, raw, peeled and deveined

Marinade Ingredients:
2 limes
2 oranges
1/4 cup olive oil
1/8 cup tequila
1 Tbsp Triple Sec
1 tsp salt
1/2 tsp curry powder
1/2 tsp cumin
1/4 tsp turmeric
1/4 tsp cayenne pepper
1/4 tsp black pepper
1/4 cup fresh cilantro or flat leaf parsley, chopped

Zest the limes and oranges into a bowl.  Juice the oranges and limes into the same bowl.  Add in the rest of the marinade ingredients and mix well.  Mix in the shrimp and marinate for 30 minutes in the fridge. 

Preheat the BBQ.  Remove the shrimp from the marinade, put them on soaked skewers.  Turn off the heat on one of your BBQ burners, so you have indirect heat.  Turn the other burner down to medium-low.  Place your skewers on the burner that’s turned off.  Cook for a minute or so, until shrimp start to turn pink.  Turn over and cook for another minute!

Enjoy this light summer meal!
The Hungry Teacher
Leave a comment

Filed under BBQ, Dinner, Fish

Grilled Pizza

Our summer finally arrived!  We had a beautiful, sunny afternoon… a perfect day for BBQing!  I am beginning to enjoy this form of cooking!  I went from burning everything I put on the BBQ to turning out moist chicken breasts!  I’ll let you in on my secret– indirect heat.  Our BBQ has three burners.  Put one on high or medium, and the other two on low.  Cook your food over the low heat.  You still get the amazing grilled flavor and the charred marks, but without the black crust over your entire food!  Plus, food like chicken breasts, which dry out so quickly, stay moist!

Grilled pizza has mystified me for a while.  Three years ago, the last summer we had a BBQ, we tried grilling pizzas, and it was a disaster.  But, I thought that I had to try again to perfect something this enticing.  It was a giant success!  Delicious!  Impressive-looking!  Fun to make!  You can use whatever you would like on your pizza.  Let your imagination and taste buds be your guide.

The main secret.  You must, I repeat, MUST have your ingredients prepped and by the BBQ before you begin this adventure.  You won’t have time to run back into the kitchen to grab something.  It has to be within arm’s reach.  I marinated the chicken for my pizzas in Greek salad dressing and quickly grilled them before making the pizza.  You can  bake, fry, grill or do whatever to your chicken!  I would recommend making individual sized pizzas, but if you want to try making a big one, go ahead!

The first thing to do is make your pizza dough.  This recipe is quick and requires no rising.  Perfect for a weeknight!

Fast and Easy Pizza Crust
Recipe from The Best of the Best and more, by The Best of Bridge

3/4 cup warm water
1 Tbsp. active dry yeast
1 tsp. sugar
1-1/2 cups flour
1/4 tsp. salt
1 Tbsp yellow cornmeal
1 Tbsp olive oil

In a small bowl, mix the warm water, yeast and sugar together.  Let sit until the yeast gets foamy, about 5 minutes.  In a large bowl, (I use my stand mixer with the dough hook), stir together the flour, salt and cornmeal.  Add yeast mixture and olive oil.  Knead to a smooth dough, about 10 minutes.  If you have a stand mixer with a dough hook, you don’t need to knead your dough.  The mixer does it for you!  You can use this dough in your normal pizza recipes for the oven.  If you’re using it for grilled pizza– keep reading.

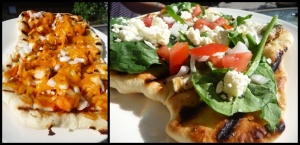
Make sure all of your ingredients are prepped.  I made a BBQ Chicken Pizza for the husband (chicken, BBQ sauce, chopped onions and grated cheddar cheese) and a Greek Chicken Pizza for myself (spinach leaves, chicken, Greek dressing, chopped tomatoes and onions, and crumbled feta cheese).

Now, make sure your BBQ is hot and have one burner on medium, and the other two on low.  I had the burner on the far ride side on high and the other two low. 

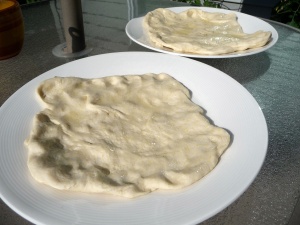
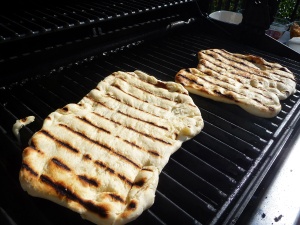
Stretch out your pizza dough.  I spread some vegetable oil on my crusts to prevent them from sticking.  I’m not sure this is necessary, as once the grill is really hot, the dough won’t stick once it’s cooked.

Put your pizza dough on the BBQ.  Close the lid and wait for about 3-4 minutes.  Open the lid.  Using a big, metal spatula, flip over the dough.  You’ll have nice grill marks on the top.

Now, put your toppings on your pizzas!  Close the grill and let them cook for a minute or two, to melt the cheese and warm everything up. 

Using my spatula and the aid of my tongs, I successfully maneuvered both pizzas onto plates without incident!

ENJOY!

The Hungry Teacher
Leave a comment

Filed under BBQ, Chicken, Dinner, Pizza

Strawberry Jam!

Hello!!  I’m back!  Hopefully I’m back for longer than just one or two blog posts before going on another extended vacation from my blog!  My life has been too busy.  Too busy to blog.  Sometimes, even too busy to cook.  But it’s summer and you don’t want to hear my sob stories.

I learned how to make jam on Monday.  I took a class with 4 other girls.  It was great fun!  My Auntie Becki (who is a great cook, by the way!) taught the class on making jams and jellies.  By the way, if you live near Bellingham or the Vancouver, BC area, Becki is available to teach private classes on any kitchen skill.  They’re about 2 hours long, and cost $15 per person per hour.  She’ll do the class at your place, or hers.  The classes are hands on, and we got to sample our jam on scones (yum!), and take home a jar of strawberry jam, grape jelly and freezer jam.  Leave me a comment if you’re interested, and I’ll pass on Becki’s contact information.

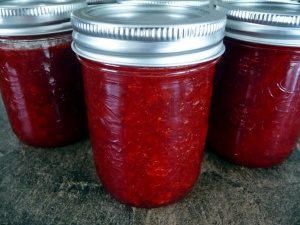
Jam is not nearly as difficult to make as you may think it is.  I made freezer jam last year, but I though cooked jam would be pretty difficult and very time-consuming.  It’s not!  I made two batches of strawberry jam, which yielded 16- 250mL (8 oz)  jars of jam.  It took me about two hours, and considering that it’s my first time making the jam by myself, I think that’s pretty awesome!

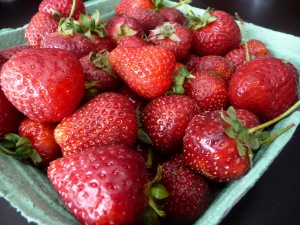
Strawberries are just finishing up their season here, and man, are they good!  They are sweet and tasty!  I went to the produce store to pick them up, and the farmers were unloading their pickup truck!  Fresh from the farm, how awesome is that!

To make jam, you need a few things:

  • large pot (8-10 qt)– this is important, don’t go smaller, because your jam will boil over!
  • measuring cups
  • wooden spoon
  • bowl to measure sugar into
  • potato masher
  • jars and rings
  • sealing lids
  • pan of some sort

Plus, you’ll need your ingredients for making the jam:

  • fruit
  • sugar
  • pectin
  • possibly lemon juice.

Pectin is the substance that makes jams and jellies gel.  It is naturally present in fruit, but the amounts vary.  You buy it in small boxes at the grocery store (mine sells it with the baking supplies).  When you make jam, you need to follow the recipe and instructions that come with your pectin.  Each brand varies, and it’s important to follow the instructions that come with your brand!  Now, you can only make one batch at a time.  And, you need a lot of sugar to make jam, but you can’t cut it back, otherwise your jam won’t gel properly.

You need to make sure everything is ready before you start.  Wash your jars in the dishwasher so they’re clean.  Prepare and mash your berries with a potato masher.  Don’t use a food processor (the instructions said).  Plus, mashing your berries is really fun! 

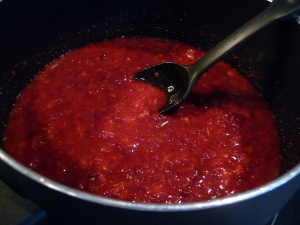
It's not a very clear picture, but this is what the crushed berries look like!

I’ll walk you through the basic process.

  1. Boil some water in a tea kettle.
  2. Put your crushed berries in your pot and combine with pectin (and lemon juice, if directed in recipe!).  Stir well, and bring to a boil.
  3. Measure your sugar out into a bowl.
  4. Once boiling, add all of your sugar at once.  Stir well.
  5. Let come to a full, rolling boil, and boil for 1 minute (or however long your recipe says).
  6. My recipe said to take the pot off the heat at this point, and stir and skim the foam off.  You’ll probably have foam on top of your jam.  Skim it off with a spoon into a bowl.  You can eat it if you want to.  It tastes delicious!  I had to stir mine for about 5 minutes at this point.
  7. Put your jam jars into a pan, and pour boiling water over the rim of each one.  This sterilizes them.  Put the sealing lids in boiling water as well.
  8. Dump out any water in your jam jar, fill it with jam (use a ladle).  Leave about 1″ of head space at the top of the jar.  With a clean, damp cloth, wipe the rim of the jar well.  Take a lid out of the boiling water, place it over top, and screw the ring on.  At this point, put your jars aside!  If you did everything right, you’ll probably hear a few pops, which means your jars are sealed.
  9. Continue the process until all of your jam is in jars!  Clean up!
  10. If your jars don’t seal (the tops will look pressed inwards), put that jar in the fridge and eat it first!  The rest of the jars will happily sit on your pantry shelf until you use them.

That’s the whole process!  Next time I make jam, I’ll try to be more diligent and take pictures of the process for you. 

It’s really actually quite easy and super rewarding to have 16 little jars staring you in the face, waiting to be eaten!

Go and try it!
The Hungry Teacher
2 Comments

Filed under Uncategorized

Roasted Potato Bacon Salad

Well, BBQ time is supposedly upon us.  We’ve had a couple of nice days in June, but it’s been pretty rainy so far.  Nevertheless, we have been out in the rain, BBQing away!

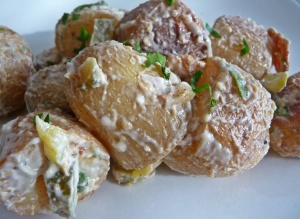
Potato salad is a classic summer food.  Although it’s delicious, your typical potato salad can get a bit boring.  This recipe is fresh and tastes lighter than the original.  The texture is unique and overall the salad has a delicious flavour!

Now, this salad has chopped up pickles, which my husband hates (I know, how can anyone hate pickles?).  He picked some of them out of the salad, but he did eat a few of them.  You could use a spoonful of dill pickle relish instead of the chopped up potatoes, which would probably be harder to detect.  I had no red wine vinegar, which the recipe called for, so I used white wine vinegar instead. 

Oh, and by the way, my herb garden is planted, and I was able to use my own fresh parsley for this!!!  What a treat!!

Roasted Potato Bacon Salad
Recipe from The Best of Chef at Home by Chef Michael Smit

4-5 slices of bacon
20 or so baby potatoes
salt and freshly ground pepper
a handful of fresh flat leaf parsley leaves
a few pickles, finely diced
1 Tbsp grainy mustard
1 Tbsp mayonnaise
a splash of red wine vinegar

Slice the bacon into thin pieces.  Brown in a saute pan until crispy.  Reserve the fat. 

Meanwhile, preheat the oven to 400°F.  Cut the baby potatoes in half.  Toss them with the reserved bacon fat and some salt and pepper.  Roast them until they are golden brown, about 40 minutes, and then cool to room temperature.  Toss the potatoes with the bacon pieces, parsley, pickles, mustard, mayo and vinegar.  Serve right away, or refrigerate till later.  This is a great dish to make the night before you’re having people over!

1 Comment

Filed under Uncategorized

Spaghetti with Shrimp and Arugula

The weather is supposedly turning warmer, the sun is supposed to be coming out…. but… it’s not!  Apparently we’re now paying for our beautiful Winter Olympic weather in January and February with a rainy, chilly June. 

But, the days are definitely longer and I am feeling ready for summery, light food! 

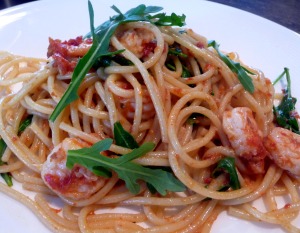
I was perusing my cookbooks, looking for a quick, light pasta dish, and I stumbled upon this recipe in Jamie’s Italy.  It’s quick, simple and it tastes delicious!  I had some for lunch the next day, and it was pretty good (of course, a light pasta dish with shrimp is truly best right after it’s made).

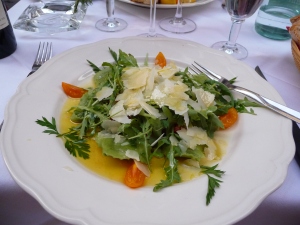
Arugula is a delicious, slightly bitter green.  It’s native to the eastern Mediterranean region (I looked it up on Wikipedia!).  I first had arugula in Florence, Italy this summer.  It was on this beautiful light tortellini dish covered with good quality olive oil, cherry tomatoes, arugula and shaved Parmesan cheese.  It was one of the best dishes I have ever had, and since then, the sight of arugula transports me right back!

My amazing Florentine dinner!

In Italy, people eat dinner late.  Most restaurants don’t even open until 8:00pm, when it’s cooler outside.  These restaurants are typically tiny, and so they set out tables and chairs right on the sidewalk or on the street!  Talk about sidewalk dining!  It’s a fantastic experience!  One day, I hope to recreate the amazing meal I had in Florence, but, tonight is not the night!

In my grocery store, they sell baby arugula prepackaged in a plastic container.  I have only seen it this way in my town, never in bulk.  In the original recipe, it says to roughly chop the arugula.  I didn’t, because mine was already quite small.

If you have leftover arugula after making this dish, it’s fantastic in a salad with a slightly sweet poppy seed dressing, fresh sliced strawberries, sweet-spiced pecans and some goat cheese.  I think I feel another blog post coming with that recipe!  Yum!

By the way, I find that most recipes have very large portion sizes.  The original recipe calls for 1 lb of dried spaghetti for 4 servings of pasta.  This makes way too much for my husband and I.  I used 1/2 lb. of dried spaghetti and I had leftovers for lunch the next day.  I did serve the pasta with garlic bread on the side.

Spaghetti with Shrimp and Arugula
spaghetti con gamberetti e rucola
Recipe adapted from Jamie’s Italy
Serves 2 – 3

1/2 lb dried spaghetti
salt and freshly ground black pepper
extra virgin olive oil
2 cloves garlic, peeled and finely chopped
1/4- 1/2 tsp. dried crushed red chili flakes
1/2 lb. peeled raw large shrimp
1/2 small wineglass of white wine
2 Tbsp. sun-dried tomato puree (I whizzed a few spoonfuls of sun-dried tomatoes in my mini food processor)
1 handful of baby arugula

Cook the spaghetti in a large pot of boiling salted water according to package directions.  In a large pan, heat 1-2 Tbsp of  olive oil.  Add the garlic and chili.  As the garlic begins to color, add in the shrimp and saute them for a minute.  Add the white wine and the sun-dried tomato puree and simmer for a couple of minutes.  When the pasta is ready, drain, reserving a bit of the cooking water.  Toss the spaghetti with the sauce and add some of the arugula to it.  Taste, add some of the reserved water if necessary to loosen the sauce and correct the seasonings, if needed.  Transfer to a plate and sprinkle with the remaining arugula.

Arrivederci!
The Hungry Teacher
Leave a comment

Filed under Uncategorized

I’m Back! And I Made Carrot Cake!

After a long hiatus, I’m back!!  I feel like I owe you an explanation, because it has been approximately one month since my last blog post.  I moved.  Just across my town.  But into a brand-new, beautiful house!  It’s been a big journey, but as we are mostly unpacked, finally getting our yard underway (houses don’t come with yards here.  Who knew?), and I’m feeling settled.  It took until Saturday (which was a month!) to get internet.  It was a debacle, which I don’t care to get into.  It shouldn’t have been that difficult.  But, lo and behold, I’m back online and ready to jump into blogging again.  I promise, I will post some pictures of my beautiful house and wonderful kitchen soon!

Since moving, I’ve been feeling pretty inspired to try new dishes.  We got a barbeque again (they weren’t allowed at our apartment), and I’ve been grilling like crazy!  I was never really a fan before, but it’s pretty fun!  I’ve roasted red peppers, made beer can chicken (which I plan to make a blog post about) and cooked a lot of random meat items.  I really want to work on grilling veggies, and try pizzas on the grill again!  It’s pretty exciting. 

But that all has nothing to do with Carrot Cake.  My husband loves carrot cake.  He doesn’t have much of a sweet tooth (neither do I…), but for carrot cake, he makes the exception. 

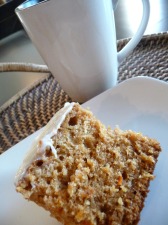
I have my grandma’s recipe for Orange Carrot Cake and it is soooooo good!  It is one of the easiest cakes you’ll ever make.  The thing that makes this cake unique is that it has a can of mandarin oranges in it.  But, you can’t taste them or even see them in the cake!  They must melt or something, but they make the cake deliciously moist!  The recipe for cream cheese icing is also pretty divine!  The whole cake is a winner.  My mom has frozen it before, fully made, and defrosted it, and it turns out great!  Oh, because of the cream cheese icing, make sure you store this beauty in the fridge!

Orange Carrot Cake
Recipe from my Grandma T., taken from our Family Cookbook.

3 cups unbleached flour
2 cups sugar
1 cup coconut (I used unsweetened, shredded coconut)
2-1/2 tsp. baking soda
2-1/2 tsp. cinnamon
1 tsp. salt
2 cups shredded carrots (which was 2 medium – large carrots)
1-1/4 cups cooking oil
2 tsp vanilla
1- 11oz can mandarin oranges (undrained; put the juice and all into the batter!– I used a 296mL can and it was fine!)
3 eggs

Preheat oven to 350°F.  Grease a 9×13″ pan.  In a large bowl, blend all cake ingredients; beat 2 minutes at highest speed.  Pour into greased pan.  Bake 45-55 minutes or until toothpick inserted in center comes out clean.  Cool.

Cream Cheese Icing

1- 8oz pkg cream cheese (softened)
2 Tbsp butter
1 tsp vanilla
3 cups icing sugar

In a medium bowl, blend icing ingredients until smooth.  Spread over cake.

XOXO,
The Hungry Teacher
1 Comment

Filed under Baking, Dessert