Category Archives: Dessert

Upside-down Blueberry Streusel Coffee Cake

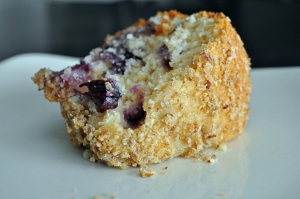
Blueberries are one of my favorite fruits!  They are not too sweet, easy to eat and they freeze well.  There are blueberry farms everywhere around here!  Everyone is growing them, and as a result, they’re pretty reasonable in price!  I’ve bought 12 lbs so far, made blueberry syrup (and canned it), coffee cake, and froze the rest!

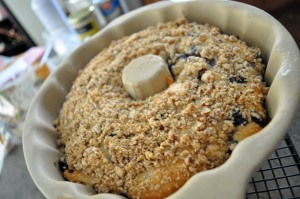
I saw the recipe for this coffee cake, and I had to try it.  The main reason is because I got a Pampered Chef stoneware bundt pan for a wedding gift that I had never used (even though I have been married for over three years!).  This presented the perfect opportunity!  The cake turned out well, and was pretty easy to make.  The thing that really bothered me about it was that you put the batter in the pan, then sprinkle the streusel over top.  BUT, when you go to take the cake out of the pan, you have to turn it upside down (which means a lot of the streusel falls off), and then turn it right side up again!  The streusel is the best part… I don’t want to lose any of it!  If you have a brilliant solution to this problem, please let me know!!!!!

Oh, and I did not have Bisquick, so I found a recipe online to make my own.  I’ll post it at the bottom of this page.  It was really easy, and it worked just fine!  I also did not have any fresh lemons, so I omitted the lemon zest.  But, it probably would have given the cake a really nice flavour, so I’ll add it next time!

Upside-Down Blueberry Streusel Coffee Cake
Recipe adapted from Eat, Shrink and Be Merry by Janet & Greta Podleski

Streusel Topping
1/4 cup chopped pecans
3 tbsp all-purpose flour
2 tbsp brown sugar
1 tbsp butter, melted

Cake
2 cups Bisquick baking mix
1 cup all-purpose flour
1 cup granulated sugar
1 tsp ground cinnamon
3/4 cup lemon yogurt (or plain yogurt, with 2 tbsp lemon juice and 1 tbsp sugar)
2 eggs
1/3 cup milk
1/4 cup vegetable oil
2 tsp grated lemon zest
1 tsp vanilla
2 cups fresh blueberries (or you can use frozen)

Preheat oven to 350°F.  Spray a bundt pan with cooking spray and dust lightly with flour.  Set aside

Combine all streusel ingredients in a small bowl and mix well with a fork.  Set aside.

Combine Bisquick, flour, sugar and cinnamon in a large bowl.  In a medium bowl, mix together yogurt, eggs, milk, oil, lemon zest and vanilla.  Add wet ingredients to dry ingredients and mix just until dry ingredients are moistened.  The batter will be thick.  Gently fold in blueberries. 

Spoon batter into prepared bundt pan.  Sprinkle streusel evenly over batter.  Bake for 40-45 min or until a toothpick inserted in the center of the cake comes out clean.  Cool cake in pan on a wire rack.  Loosen edges using a knife.  Invert cake onto a serving plate, and then flip cake over so the streusel is on top. 

Enjoy!

Homemade Bisquick
Recipe from this forum.  There are many out there, but most had shortening and/or dry milk in them (neither of which I had at home).  I made half a batch, and am storing the rest in my fridge, looking for ways to use it!!

9 cups all-purpose flour
1/2 cup baking powder
1 tsp salt
1-1/4 cups canola oil

Mix dry ingredients well.  Cut in oil with a pastry blender until the mixture looks like cornmeal.  Store, tightly covered, in the fridge.  Use like you would Bisquick! 

Have fun!
The Hungry Teacher

Leave a comment

Filed under Baking, Dessert

I’m Back! And I Made Carrot Cake!

After a long hiatus, I’m back!!  I feel like I owe you an explanation, because it has been approximately one month since my last blog post.  I moved.  Just across my town.  But into a brand-new, beautiful house!  It’s been a big journey, but as we are mostly unpacked, finally getting our yard underway (houses don’t come with yards here.  Who knew?), and I’m feeling settled.  It took until Saturday (which was a month!) to get internet.  It was a debacle, which I don’t care to get into.  It shouldn’t have been that difficult.  But, lo and behold, I’m back online and ready to jump into blogging again.  I promise, I will post some pictures of my beautiful house and wonderful kitchen soon!

Since moving, I’ve been feeling pretty inspired to try new dishes.  We got a barbeque again (they weren’t allowed at our apartment), and I’ve been grilling like crazy!  I was never really a fan before, but it’s pretty fun!  I’ve roasted red peppers, made beer can chicken (which I plan to make a blog post about) and cooked a lot of random meat items.  I really want to work on grilling veggies, and try pizzas on the grill again!  It’s pretty exciting. 

But that all has nothing to do with Carrot Cake.  My husband loves carrot cake.  He doesn’t have much of a sweet tooth (neither do I…), but for carrot cake, he makes the exception. 

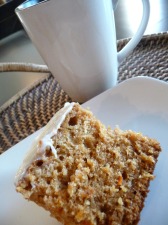
I have my grandma’s recipe for Orange Carrot Cake and it is soooooo good!  It is one of the easiest cakes you’ll ever make.  The thing that makes this cake unique is that it has a can of mandarin oranges in it.  But, you can’t taste them or even see them in the cake!  They must melt or something, but they make the cake deliciously moist!  The recipe for cream cheese icing is also pretty divine!  The whole cake is a winner.  My mom has frozen it before, fully made, and defrosted it, and it turns out great!  Oh, because of the cream cheese icing, make sure you store this beauty in the fridge!

Orange Carrot Cake
Recipe from my Grandma T., taken from our Family Cookbook.

3 cups unbleached flour
2 cups sugar
1 cup coconut (I used unsweetened, shredded coconut)
2-1/2 tsp. baking soda
2-1/2 tsp. cinnamon
1 tsp. salt
2 cups shredded carrots (which was 2 medium – large carrots)
1-1/4 cups cooking oil
2 tsp vanilla
1- 11oz can mandarin oranges (undrained; put the juice and all into the batter!– I used a 296mL can and it was fine!)
3 eggs

Preheat oven to 350°F.  Grease a 9×13″ pan.  In a large bowl, blend all cake ingredients; beat 2 minutes at highest speed.  Pour into greased pan.  Bake 45-55 minutes or until toothpick inserted in center comes out clean.  Cool.

Cream Cheese Icing

1- 8oz pkg cream cheese (softened)
2 Tbsp butter
1 tsp vanilla
3 cups icing sugar

In a medium bowl, blend icing ingredients until smooth.  Spread over cake.

XOXO,
The Hungry Teacher

1 Comment

Filed under Baking, Dessert

GOLD!!!

I’m proud to be a Canadian! 14 gold medals and an amazing experience, the Olympics over. It’s been a great experience… we went to women’s preliminary curling and the preliminary Canada vs. US men’s hockey game, plus we spent a day enjoying the atmosphere in Vancouver. It was an incredible party!

So, on Sunday, for the Gold Medal hockey game (Canada vs. US, in case you missed it!), one of my friends had some people over for a party. We had a great time, and were incredibly nervous when the US tied the game in the final seconds. But, just a few minutes later, in overtime, when Sidney Crosby scored, there was cause for GREAT jubilation!!!!!!!

I decided to try to make a Team Canada hockey jersey cake! It turned out great… it took me a lot longer to decorate than I anticipated, but the results were worth it!  I haven’t decorated a lot of cakes before, so this was a learning experience for me!

First, I baked a 9 x 13″ cake. I used my Grandma’s Pound Cake recipe.  I baked it for 30 minutes and it was perfect!  I used a chocolate cake mix and chocolate pudding mix.

Then, I let the cake cool for 10 minutes in the pan on a wire cooling rack.  After this, I took the cake out of the pan and let it cool on the wire rack overnight.

In the morning, I cut the cake by following the instructions on this blog I found.  It basically involves cutting the cake and reassembling it.  It’s really easy.  I think next time I make the cake, I am going to trim the top of the cake to make it level (when I assembled the cake, I put the bottom on the top, but then, the unlevel top made the bottom uneven).

After that, I put a crumb coat on the cake.  I used the Vanilla Buttercream Frosting recipe.  A crumb coat is a thin layer of icing that you put on the cake to contain the crumbs.  Let the crumb coat dry for a while (maybe 15 minutes).  I ended up having to do another crumb coat, as the crumbs kept getting on the second coat (remember, I am an inexperienced cake decorator!).  A note:  keep the bowl of frosting covered with a damp tea towel.  Otherwise, it dries up really quickly.  I then made half a batch of frosting because I ran out.  I put the top coat of frosting on.

Now, I only have liquid food coloring at home (the cheap stuff from the grocery store).  To get the best colour for frosting, you have to use the paste colouring that you buy at a cake decorating store.  And by the time I thought about this, it was 10:00pm on Saturday night, and all cake decorating shops are closed.  I was worried that my frosting would only turn out pink, and not red.  Who wants a pink maple leaf on a Team Canada cake?  So, I went to the grocery store and found some cookie frosting that was premade in a tube.  It was the perfect colour!

Now, I am not an artist.  So, to create the perfect maple leaf, I printed a Canadian flag out on my computer.  Then, I cut out the maple leaf.  After that, I put in on the jersey and lightly traced around it with a sharp knife.  Then, I peeled off the paper, and went to work tracing around the outline with the frosting.  I then filled it in, and added the rest of the details!

On Sunday morning, cutting and decorating the cake took me about two hours in total.

And, voila!  A patriotic, Go Canada Go! cake.  By the way, it tasted great and received rave reviews.

The jersey cake idea is totally versatile, and now all I’m waiting for is the Vancouver Canucks to make it into the Stanley Cup final so  I have an excuse to make another one!

Proud to be a Canadian!
The Hungry Teacher

Stumble It!

7 Comments

Filed under Chocolate, Dessert

Cocoa Brownies!


So, when I opened up my google reader this morning to indulge in my favourite food blogs, this post by Smitten Kitchen caught my eye!  It is for “The Best Cocoa Brownies”.  The beautiful pictures and the great description caught my eye.

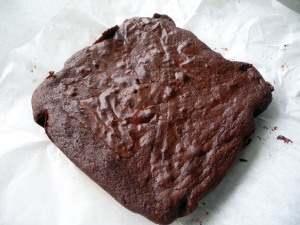
So, I made them.  WOW!!!!!!!!! Incredible brownies!  They are fudgy, chocolatey, rich and delicious!!!! 

Smitten Kitchen says that they taste similar to “gasp!” boxed brownie mix.  When I brought my brownies to my “testers” (mom and sister), my sister said that they tasted like brownie mix, but better.  I knew Smitten had a winner of a recipe when my mom called me as soon as she got home and asked for the recipe!

The recipe calls for a double boiler.  I just use a stainless steel bowl over a pan of simmering water.  It works just fine!  Apparently, Smitten Kitchen says that you can use a microwave too.  But I like the double boiler method.  It’s fun!

So, here is the recipe.  You’ve gotta try it!!!

Best Cocoa Brownies
recipe from Smitten Kitchen — check it out.  Her pictures are amazing!
Makes 25 small brownies

3/4 cup unsalted butter (I used salted butter, because it was what I had, and I decreased the salt to a couple shakes from my table salt shaker)
1-1/4 cup sugar
3/4 cup plus 2 Tbsp cocoa powder (I used Fry’s, it was good!)
1/4 tsp salt (decrease salt if using salted butter!)
1/2 tsp pure vanilla extract
2 large eggs, cold
1/2 cup all-purpose flour

Place a rack in the bottom third of the oven and preheat to 325°F.  Line an 8×8″ pan with parchment paper, leaving some hanging over the sides.

Combine the butter, sugar, cocoa powder and salt in the top of a double boiler.  Heat over a pan of lightly simmering water.  Stir occasionally until the butter is melted.  Take off of the water, and let sit for a few minutes to cool down a bit.  Stir in the vanilla.    Add the eggs one at a time, stirring well after each one is added.  When the batter is shiny and well-blended, add the flour.  Stir until just combined, and then beat vigorously for 40 strokes with a spoon.  Pour into the prepared pan. 

Bake for 20-25 minutes, or until a toothpick comes out with a little bit of moist batter on it.  My brownies took closer to 30-35 minutes to cook.  Let the brownies cool completely, then take them out of the pan, by pulling on the overhanging parchment paper, put on a cutting board and cut.  I washed my knife with hot water in between cuts to clean the knife and facilitate cutting.  Cut into 25 squares (or if you’re feeling over-indulgent, 16 squares!)

Enjoy these brownies!
The Hungry Teacher

Leave a comment

Filed under Chocolate, Dessert

Creme Brulee

On the weekend, I went to go see a play at the UFV theatre, Paper Wheat.  It was a great play!  I would recommend it.  It’s a musical about the Wheat Pool in Saskatchewan.  It sounds… well, kinda boring… but they did a good job!

We went to see the play with my mother-in-law and brother-in-law and his girlfriend.  I invited them all over for dessert.  It’s always a tough decision to decide what to make.  I paged through a few cookbooks, and in Make it Fast, Cook it Slow, there is recipe for slow-cooker creme brulee.  I decided to try it (it’s one of my mother-in-law’s favourite desserts).

It was a lot easier than I thought it would be!  I was going to use my slow cooker to cook the custard the first time, but, I wanted to make the creme brulee in individual ramekins, rather than in one dish like the recipe called for.  BUT, 5 ramekins would not fit into the slow cooker!  Grr!!  So, I ended up adapting the recipe for the oven.  I do not have a kitchen blow torch, so I had to broil them to caramelize the sugar on top. 

The creme brulee tasted delicious, but, it was a bit runny for some reason.  I’m wondering if it is because I broiled them, rather than torching them.  I think that may have overheated the dessert, causing the custard to seperate.  And, we ate it right away, after it was broiled, rather than chilling it again.  But, regardless, the dessert turned out wonderfully… even better than I thought!

Creme Brulee
adapted from http://crockpot365.blogspot.com/2008/02/crockpot-crme-brulee-recipe.html

2 cups heavy cream
5 egg yolks
1/2 cup sugar
1 Tbsp vanilla
1/4 cup raw sugar (for topping, later!)

Preheat the oven to 350°F. 

Get 4-6 ramekins and make sure that they fit into a baking dish (I used a 9×13 pan).  Place them in the dish.  Beat the egg yolks, then slowly whip in the cream, sugar and vanilla.  Mix until smooth.  Pour the mixture into the ramekins.  Now, put the 9×13 pan on the oven rack and add tap water around the ramekins, until the water is halfway up the ramekins outer side.   Put this in the oven, and cook for around an hour.  Mine took closer to one hour and 20 minutes.  When the edges are set, but the center is still jiggly, remove from the oven. 

If you would like to try it in the slow cooker, pour the custard into a dish that will fit inside your cooker.  Try a 1-1/2 quart dish.  Then, add water to the outside of the dish until it is halfway up the outside of the dish.  Cook on high for 2-4 hours.  Chill for 3 hours. 

Place the ramekins in the refrigerator and chill for at least three hours.   Turn on the broiler (or your kitchen blow torch).  Sprinkle raw sugar on the top of each custard .  Broil until the sugar is caramelized.  Now, you can chill them again for a few hours until they are cool.  Eat and enjoy!

Go ahead!  Try it!
The Hungry Teacher

5 Comments

Filed under Dessert, Slow cooker

Cute Cupcakes!

A close friend of mine had a beautiful baby girl on December 23 (my dad’s birthday!), and  I had the chance to help throw her a baby shower.  We had the baby shower on Tuesday and it went great!  It was a lot of work, and I came home thoroughly exhausted, but it was fun, and I think mommy felt really special!

I decided to make cupcakes for the shower instead of a cake.  Something different, you know!  Cupcakes are so cute, and I was able to borrow 3 cupcake stands, which made for a nice presentation!  The cupcakes were a lot of  fun to make.  I made them on Sunday afternoon and iced them on Monday.  We served them at the baby shower on Tuesday, and my students eagerly gobbled up the leftovers, leaving a few for me to share with fellow staff members on Wednesday. 

All in all, the cupcakes were a success, even though there weren’t very many eaten.  There was a lot of other food that was brought by fellow guests, and there was also some other beautiful desserts. 

The cupcake recipe is so simple, I can’t believe I’m sharing it.  It was the recipe my Grandma Tolmie always used for wedding cakes and all of her amazing confections.  My Auntie uses it when she makes wedding cakes (even ours!).  The recipe ALWAYS turns out, and makes a moist, flavorful cake.  The recipe uses cake mix and instant pudding mix.  Feel free to mix and match the flavours to your heart’s content.  I made one batch of vanilla cupcakes and one batch of chocolate cupcakes (24 cupcakes each).  Because my recipe is from Grandma, and especially because she’s no longer around to ask questions of, I am not sure of the different sizes of pans and baking times for each one for this recipe.  I believe it’s pretty much the same as on the back of the cake mix box.

I used the recipe from my good old Betty Crocker cookbook for Buttercream Frosting.  It is so good!  I made the mistake of looking at the nutritional information.  Don’t.  Just realize that it’s a once-in-a-while treat!  If you only have it occasionally, it’s just fine, and definitely worth it!  Yum!!

Grandma’s Pound Cake
Recipe from Grandma Tolmie

1 cake mix
1 pkg. instant pudding mix
4 eggs
1 cup water
1/2 cup oil

Mix all ingredients until smooth.  Pour into prepared pan.  Bake at 350°F for at least 35 min. 

That’s all I have!  Use your discretion and follow the times on the back of the cake mix box.  This recipe made 24 cupcakes for me.  I used paper liners and took them out of the muffin tin right away, because I was making another batch. 

Vanilla Buttercream Frosting
from Betty Crocker Cookbook

3 cups powdered sugar
1/3 cup butter, softened
1-1/2 tsp vanilla
1-2 tbsp milk

Mix powdered sugar and butter in medium bowl with electric mixer on low speed (I used my hand mixer).  Stir in vanilla and one tbsp of the milk.  Gradually beat in just enough remaining milk to make frosting smooth and spreadable.  If frosting is too thick, beat in milk a few drops at a time.  If it’s too thin, beat in a small amount of powdered sugar.

I made 2 batches of frosting and it was enough for my 4 dozen cupcakes!

Enjoy!
The Hungry Teacher

2 Comments

Filed under Dessert

Chocolate Chip Biscotti

Sunday night, the husband and I invited ourselves over to my parents’ house for dinner.  My mom asked me to bring dessert.  What to bring?!?  I had no ideas… I didn’t want anything too sweet, but I did want chocolate.  Hmm, what to have? 

I decided on biscotti.  When I lived at home, I used to make biscotti a lot, and my dad used to really enjoy it.  I thought it would be a nice treat for him. 

The other thing I love about my biscotti recipe is that it is low in calories and fat, yet it still definitely satisfies a craving for a chocolately treat.  If you’ve never made biscotti before, it’s actually really not that difficult.  They are formed into a log once and baked.  Then the biscotti need to cool.  Once they are cool, they are sliced and baked again, to create the hard texture. 

Dipping a crisp biscotti into a cup of delicious coffee is a great pleasure.  The cookie gets soft and begins to take on the coffee flavour.  Sooo delicious!

This recipe is a great basic recipe that lends itself well to additions.  The sky is truly the limit when it comes to a recipe like this one.  Next time, I am going to chop up a Lindt Dark Chocolate Orange bar and use it as chunks in my biscotti.  Yum! 

By the way, I have to give a shout out to my mom, probably my most dedicated blog reader.  Thanks mom!  She helped me set up the biscotti for these shots, and they turned out great!  Thanks a lot!  Love you!

Chocolate Chip Biscotti
adapted from One Smart Cookie

2 tbsp butter, softened
3/4 cup sugar
2 large eggs
1 tsp vanilla
2 cups flour
2 tsp baking powder
1/4 tsp salt
1/2 cup chocoate chips, plus extra for dipping or drizzling, if desired

Preheat the oven to 350°F.  In a large bowl, mix butter, sugar, eggs and vanilla until smooth.  In a medium bowl, mix flour, baking powder and salt.  Add the flour mixture and chocolate chips to the egg mixture (I got distracted and didn’t premix the flour in another bowl.  The biscotti turned out fine).  Stir just until combined.  You may need to use your hands to help you combine the dough.
Turn the dough onto a floured surface.  Divide in half and shape each piece into an approximately 8″ long log.  Place logs on a cookie sheet that has been sprayed with non-stick spray (I used my Sil-Pat sheet on top of the baking sheet, instead of spray).  Flatten each rectangle so it is about 3″ wide.
Bake for 20-25 minutes, until firm and starting to crack on top.  Transfer the logs to a wire rack to cool for about 15 minutes.  Reduce oven temperature to 250°.
Cut each log diagonally into 1/2″ to 3/4″ slices with a serrated knife.  Place biscotti cut side down on a baking sheet.
Return to oven for 15 minutes, then flip over and bake for an additional 15 minutes.  Transfer to a wire rack to cool.
After cool, I melted some chocolate and dipped the bottom of each biscotti intoit.  It adds some additional chocolate yumminess, but it is not a necessary step.  If you’re a fan of white chocolate, some drizzled over the top would be really nice too!

Go have some biscotti and coffee!
The Hungry Teacher

9 Comments

Filed under Dessert

One Bite Brownies

Last night, the husband and I went to see Greg Mortenson, the author of Three Cups of Tea.  He is an amazing man!  He was  a mountain climber, who failed to reach the summit of the world’s second highest mountain, K2.  On the way down, he got lost, and stumbled into the tiny, remote village of Korphe in Northern Pakistan.  While there, he made  a promise to return and build a school for girls.  He came back to the States to raise money, and did go back!  Greg kept going back to Afghanistan and Pakistan and has now built over 130 schools.   As a part of our ticket price, we received a copy of his second book Stones into Schools.  I haven’t read that one yet, but I highly recommend Three Cups of Tea as an inspiring read.

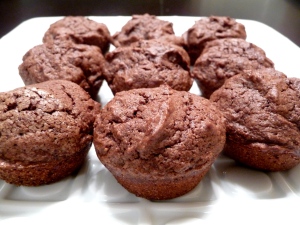
So, on to food now.  One Bite Brownies is a recipe I came across in the book Grazing by Julie Van Rosendaal.  It’s a fantastic, quick recipe for brownies.  I made them from start to finish in about 40 minutes.  I really like to take my time when baking and cooking, so that’s pretty good!  If you’re a fast worker, you could make them in 30 minutes, I bet! 

These brownies are reminiscent of the packaged kind that you buy in brown paper bags at the supermarket.  But, homemade brownies always taste better!  Plus, these are a lot healthier!  And, it feels good to serve brownies to people and have them comment on how delicious they are.  I love to watch people enjoy the food I make. 

So, here’s the recipe.  It’s great just as it’s written, but I think next time I make them, I am going to add in some chopped chocolate.  YUM!!  I used a cookie scoop (medium-sized) to put the batter in each mini-muffin tin cup.  I would highly recommend this.  It’s easy to get an even amount in each cup, and the spring-loaded action of the scoop makes it simple to get all of the delicious sticky batter out of the scoop!  Also, I let some of them cool completely in the pan, and they were a bit hard to get out.  I would recommend gently removing the brownies from the pan before they are completely cooled.

One Bite Brownies
adapted from Grazing
makes 24 brownies

1/4 cup butter, softened
1-1/4 cups sugar
1 large egg
2 large egg whites
1 tsp vanilla
1 tsp instant coffee granules, dissolved in 1 tsp water
1 cup flour
1/2 cup cocoa
1/4 tsp baking powder
1/3 tsp salt

Preheat oven to 350°F. 

In a large bowl, mix butter and sugar until well-combined.  Add in egg, egg whites, vanilla and coffee, and mix until smooth.

In a medium bowl, mix flour, cocoa, baking powder and salt.  (I should have sifted mine, as I was left with tiny lumps).  Add to the egg mixture, and stir by hand until just combined.

Spray a mini muffin pan with non-stick cooking spray.  Scoop an equal amount of batter into each cup.  Bake for 12-15 minutes, until puffed, but still soft.  Don’t overbake them!!!!  Cool in the pan on a wire rack.

Enjoy these treats!
The Hungry Teacher

6 Comments

Filed under Dessert

Blueberry Coffee Cake


So, last night I had some company coming over for a meeting.  It is always nice to serve treats when company is coming over.  But, what to make when you get home from work at 5:00 and don’t really want to go to the grocery store again?

The answer to that question is Blueberry Coffee Cake.  I got this recipe from my mom.  Now, to tell you the truth, I have no idea where she got it from.  My first memory of this coffee cake is when we had photographers to our house to come take our family portrait.  I think it was in 1995 or 1996.  All of us (mom, dad, sister, brother and me) wore denim.  Yes, denim.  It’s quite the portrait.  My parents still have it in their family room.  So, my mom made this coffee cake to serve the photographers, and allowed us kids to try a piece (it was a big deal to have an adult dessert back then).  I fell in love, and I was not certain if I had ever tried a sweet treat that was so delicious.  By the way Mom, this is a true story.  And thank you so much for this dessert recipe!

This coffee cake is a wonderful snack to serve with coffee or tea in the evening.  It is also great with a recess coffee (I know that there are people out there that have coffee breaks, but in elementary school, we have recess).   

The only thing about this recipe is that it is messy to eat.  The cinnamon sugar topping crumbles a bit and makes a mess.  BUT, I think that the mess is totally worth making and eating this cake.  Try it.  You won’t regret it.

Blueberry Coffee Cake
recipe from my mom, Kathy Tolmie

Makes an 8×8 pan (at least 12 pieces)

1/2 cup butter
3/4 cup sugar
2 eggs
1 tsp. vanilla extract
3/4 cup milk
2 cups flour
2 tsp. baking powder
1 cup blueberries- fresh or frozen
Topping
3/4 cup brown sugar
4 tsp. cinnamon

Preheat oven to 350° F.  Cream butter and sugar together.  Mix in eggs and vanilla until they are combined.  Mix in milk, flour and baking powder just until combined.  Fold in blueberries.  Pour mixture into 8×8 pan and spread out evenly.  Mix topping and sprinkle on top.  Bake for 35-40 minutes, or until a toothpick inserted in the center comes out clean.  (Note:  this took closer to 45-50 minutes to cook in my oven).  Let cool and enjoy!

XOXO,
The Hungry Teacher

1 Comment

Filed under Dessert